
Many people look to convert HTML to WordPress theme or migrate from other formats to enjoy the convenience of easily extending the functionality of their website. One such easily conducted activity is to add a floating side tab on WordPress interfaces. A sticky side tab is a powerful tool for improving the user engagement and boosting a website’s conversion rate. Owners can place social icons, contact forms or any other desired item to engage visitors. The side tab also acts as a convenient navigation option directing people to vital sections of an interface. In this article, we are providing a simple method to add the feature to WordPress websites using the following steps:
1. Install The Plugin For Adding The Feature
WordPress users can add a desired functionality or feature to a website by installing a suitable plugin. We will also use a plugin to add a sticky side tab to WordPress interfaces. There are various tools available for the purpose and we will use the Easy Side Tab Pro plugin. It is a premium product which allows users to create as many side tabs as they want. The product comes with 10 pre-built templates and 4 position options for a tab. Users have the facility to use its WYSIWYG Editor for customizing their tab. They can display HTML contents, shortcodes, Twitter feeds, social icons etc. with this tool. Log on to the WordPress admin dashboard with your username and password. Go to “Plugins> Add New” and type the name of the plugin in the search box. Pay the subscription price and download the core files of the plugin. Activate the plugin on your website after you have successfully completed its installation and move on to the next step.
2. Create A New Side Tab
We will now create a new side tab with the help of the tool. Access the control panel of your website and locate the plugin. Once you have successfully installed and activated the plugin, it will become visible in the menu under “Plugins”. Click on it to start the process of creating the new tab. You will be directed to a new screen where you will see the “Add Tab” button. The option will be visible in the top left-hand corner. Click on the button which will take you to the settings page of the new tab. We will discuss this page in detail in the next step.

3. Configure The Settings Of The Side Tab
The composition of the side tab will be finalized now. In this next step of the process to add a floating side tab on WordPress we will configure the settings. As mentioned earlier, you have now been directed to a new screen where you can edit the tab. See the option for “Tab Settings” on the top of the page. Click on it and then choose the items you want to keep in the side tab. You have the freedom to insert as many items as you want to, in the sticky tab. You can add the text to be displayed with an item along with its icon. There is the option of choosing either the text or the icon or both to be displayed in the tab.
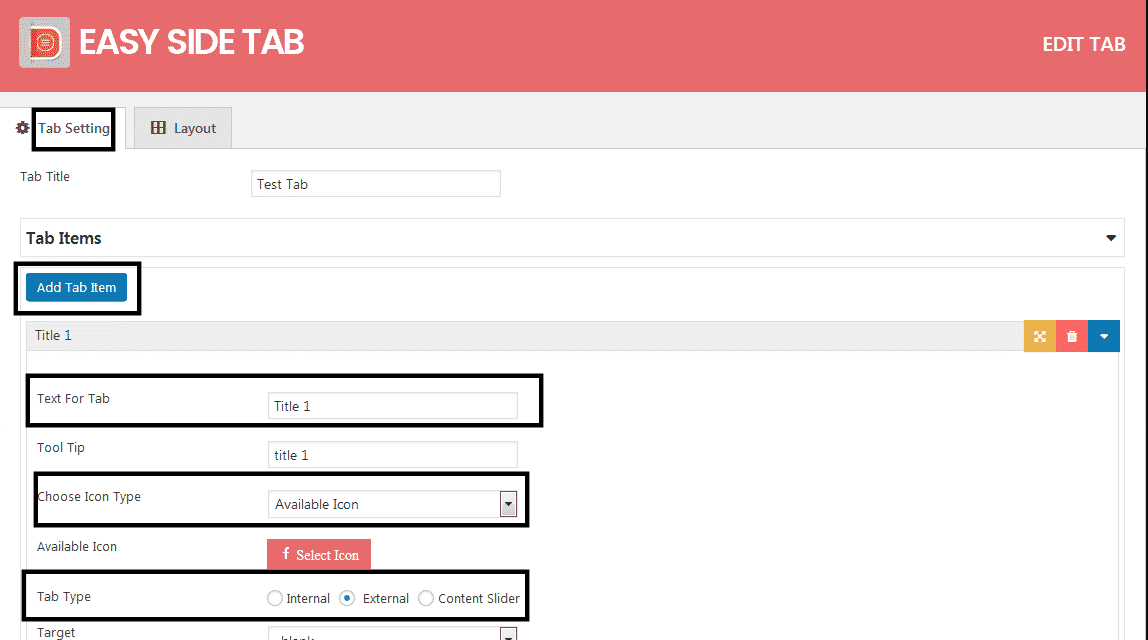
The URL of the item can also be added in the specified field. Users also have the option to add internal or external links to the tab. Once you have chosen all the items and made other selections, click the “Save Settings” button at the bottom.
4. Select A Layout For The Tab
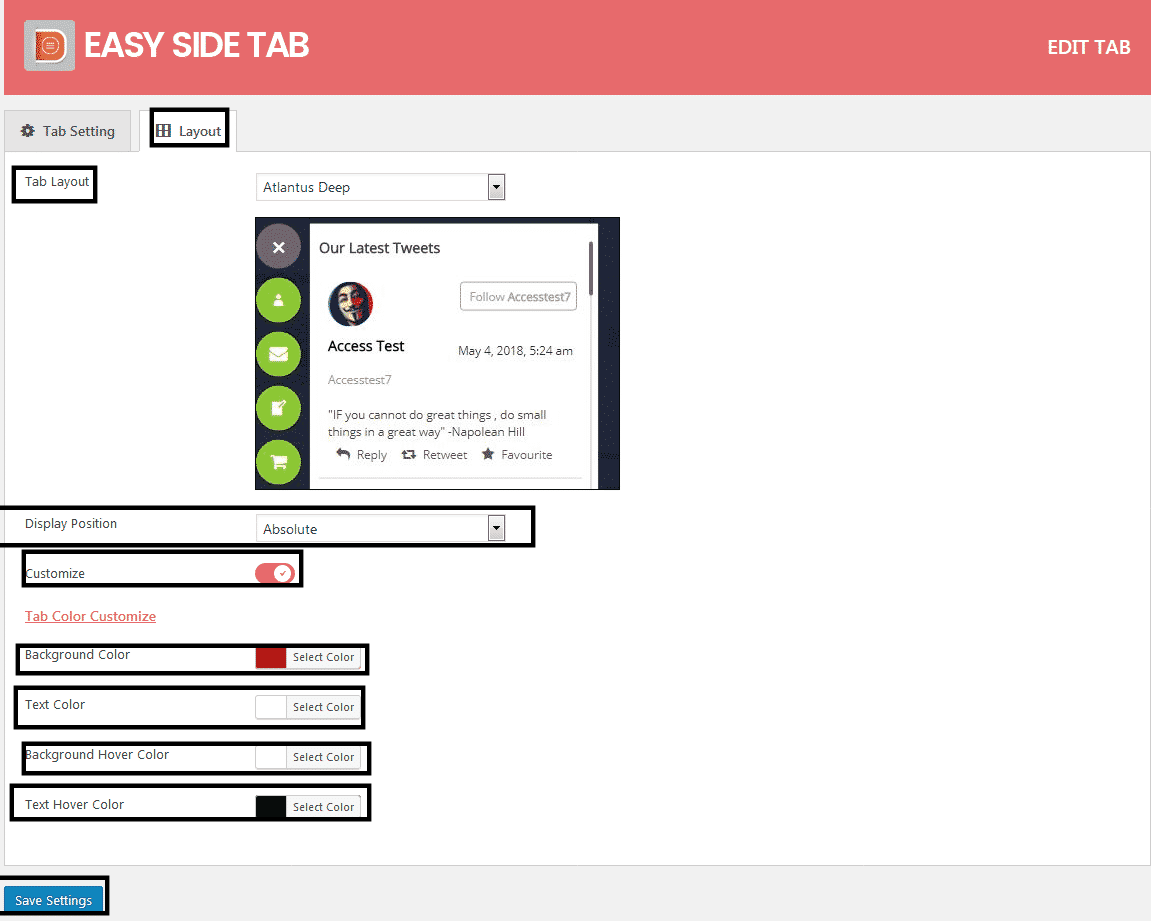
Besides the “Tab Setting” option, is the button for “Layout”. Click on it to finalize the appearance of the new side tab. Choose a layout from the dropdown menu provided in the “Tab Layout” option. Select the “Customize” option to choose shades for the background and the text. You can also choose different colors for background and text for the hover effect. Configure the “Display Position” settings in this step. Once you have completed the modifications, click the “Save Settings” button at the bottom of the screen.
5. Add The New Tab To The Website
In the last step of the process, you will choose a location for the new tab on your interface. Go to the “Side Tab Settings” option of the plugin. Toggle the button against the “Enable Side Tab” option to activate the new tab. Choose the pages in the “Display Page” option on which the tab will be visible. The tab that you have created is responsive and can be displayed on mobile devices. However, you need to toggle the “Enable Side Tab For Mobile” button to show it on smartphones. Click the “Save Settings” tab to confirm the changes that you have made. Check your website to see whether the floating tab is visible or not.

Conclusion
This simple method to add a floating side tab on WordPress interfaces will help website owners in introducing a beneficial feature for boosting the engagement of the target audience.
About Guest Author:
The author is an WordPress expert & consultant in HireWPGeeks – Best WordPress Development Company. He is fond of writing WordPress tutorials and always lookout for opportunities to interact with WordPress communities.